Did you send an important quote, only to have the client claim they never received it? Or are your company emails consistently landing in the spam folder? This may not be an issue with your content, but rather a misconfiguration of your Domain Authentication!
In the ongoing battle of cloud communications, DMARC, DKIM, and SPF are three indispensable email authentication mechanisms. Together, they form a robust defense network designed to combat spammers, phishers, and other unauthorized third parties attempting to impersonate your corporate domain. These are not merely technical parameters; they represent the first line of defense in establishing brand trust. In this edition of the Microfusion GWS Classroom, we will explain the underlying principles and guide you through the configuration process within Google Workspace.
What Are SPF, DKIM, and DMARC? How Should You Choose?
Faced with a string of technical acronyms, many administrators ask: “Do I really need to configure all of them?” The answer is: Yes, we strongly recommend implementing all three.
- SPF (Sender Policy Framework): Verifies that an email is sent from an authorized mail server on behalf of your domain, helping prevent attackers from impersonating your organization.
- DKIM (DomainKeys Identified Mail): Adds a digital signature to your emails, ensuring message content remains intact and unaltered during transmission.
- DMARC (Domain-based Message Authentication, Reporting, and Conformance): Instructs receiving servers on how to handle emails that fail SPF or DKIM checks—whether to quarantine, reject, or simply report them—providing visibility and control over domain misuse.
Microfusion recommends enabling both SPF and DKIM simultaneously. Simply put: SPF confirms “the sending source is authorized,” while DKIM verifies “the sender’s identity and message integrity.” Using both together sends the strongest trust signal to email providers. Building on this foundation, you can then use DMARC to define enforcement policies—and optionally integrate BIMI (Brand Indicators for Message Identification) to display your verified brand logo in recipients’ inboxes. This layered approach significantly enhances brand recognition and email open rates.
Step-by-Step Guide: Google Workspace Email Authentication Setup SOP
If you are using Google Workspace (Gmail for business), please follow the steps below to configure your DNS management interface.
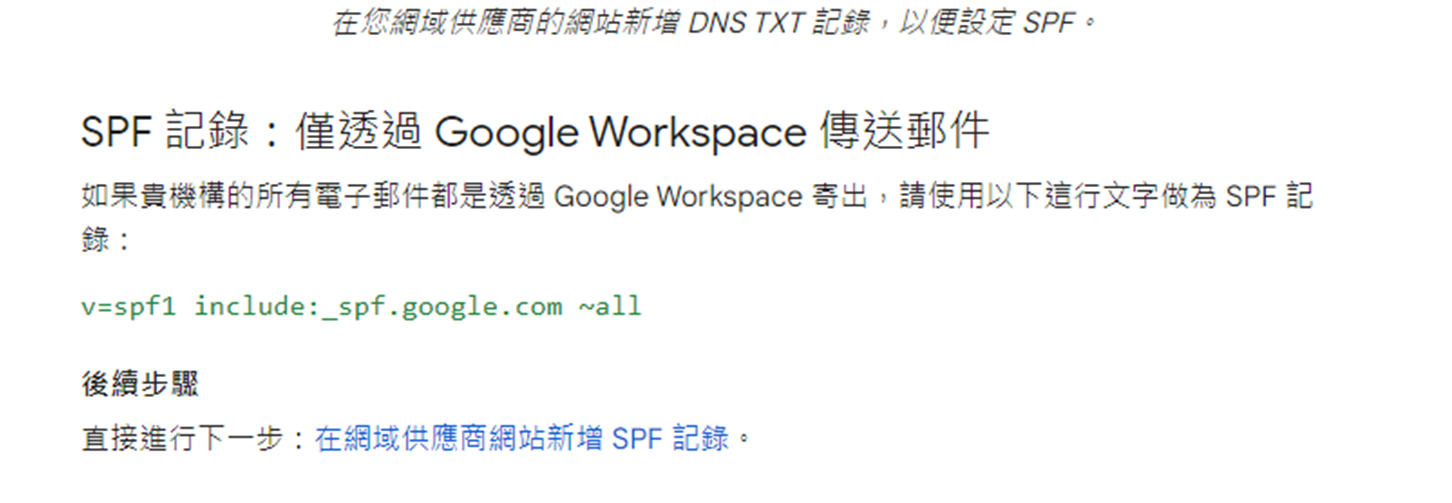
Step 1: Configure SPF (Define Sending Sources)
SPF is the most fundamental layer of defense. Add a new TXT record in your DNS settings with the following parameters:
- For detailed configuration instructions, please refer to: Defining SPF Records – Basic Configuration
- As stated in the documentation: Please configure the following parameter in your DNS TXT record: v=spf1 include:_spf.google.com ~all
💡 Microfusion Tip: The ~all tag instructs receiving mail servers to mark emails sent from servers not listed in your SPF record as suspicious (soft fail). We recommend using the ~all tag in your SPF record for balanced security and deliverability.
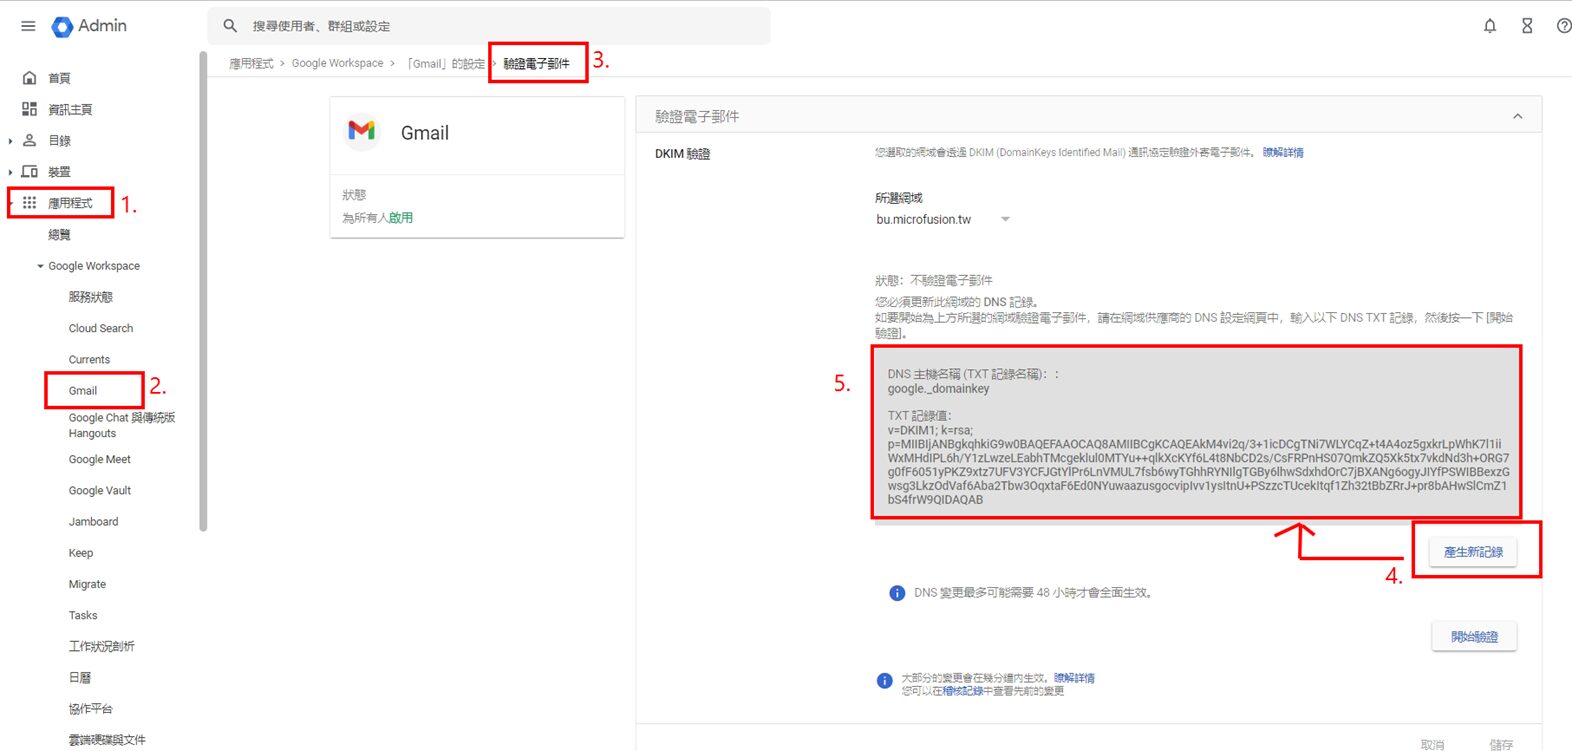
Step 2: Configure DKIM (Enable Digital Signatures)
This step ensures email content integrity and requires configuration via the Google Admin Console:
- For detailed instructions, please refer to: Turn on DKIM for your domain
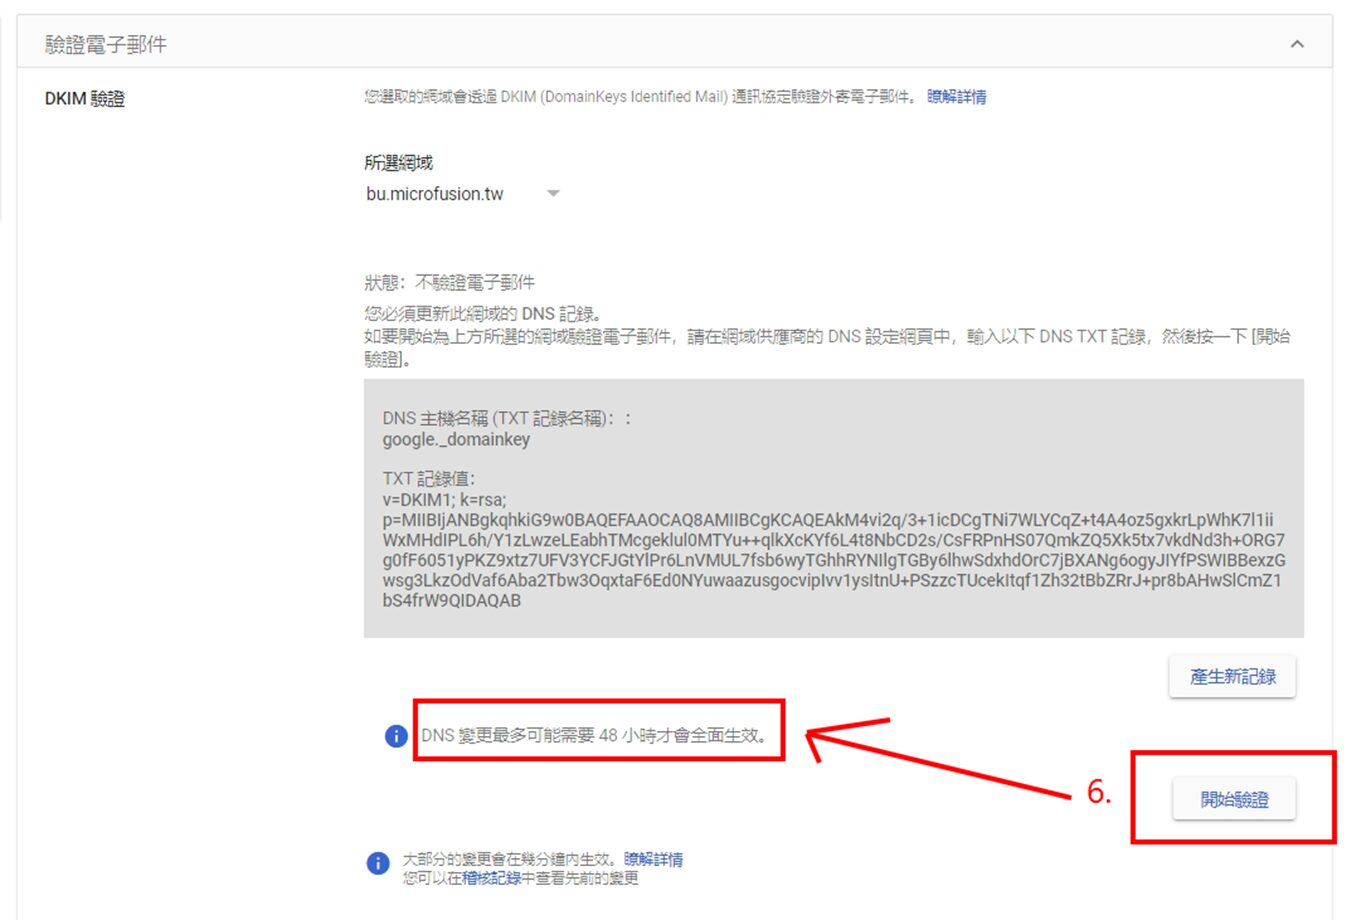
- Navigate to: Admin Console > Apps > Google Workspace > Gmail > Authenticate email, then click “Generate new record”.
- Add the generated TXT record parameters to your DNS configuration.
- Return to the same page in the Admin Console and click “Start authentication”.
Note: DNS propagation may take up to 48 hours for this verification to fully take effect.
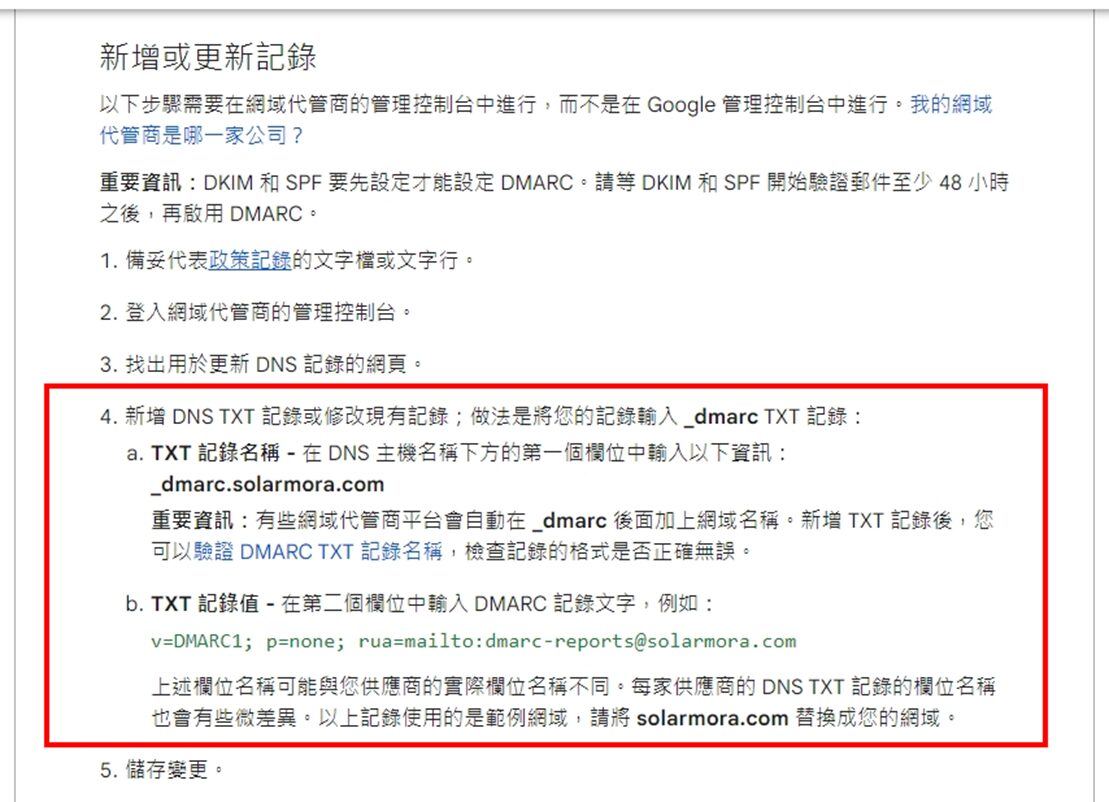
Step 3: Configure DMARC (Final Enforcement Policy)
With SPF and DKIM in place, the final step is to implement DMARC to instruct receiving servers how to handle emails that fail authentication checks. Please add a new TXT record with the following parameters:
- For detailed instructions, please refer to: Add a DMARC record
- As stated in the documentation, please configure the following parameters in your DNS TXT record:
TXT Record Name: _dmarc.solarmora.com (replace the highlighted portion with your company’s domain)
TXT Record Value: v=DMARC1; p=none; rua=mailto:dmarc-reports@solarmora.com (replace the highlighted portion with your company’s domain)
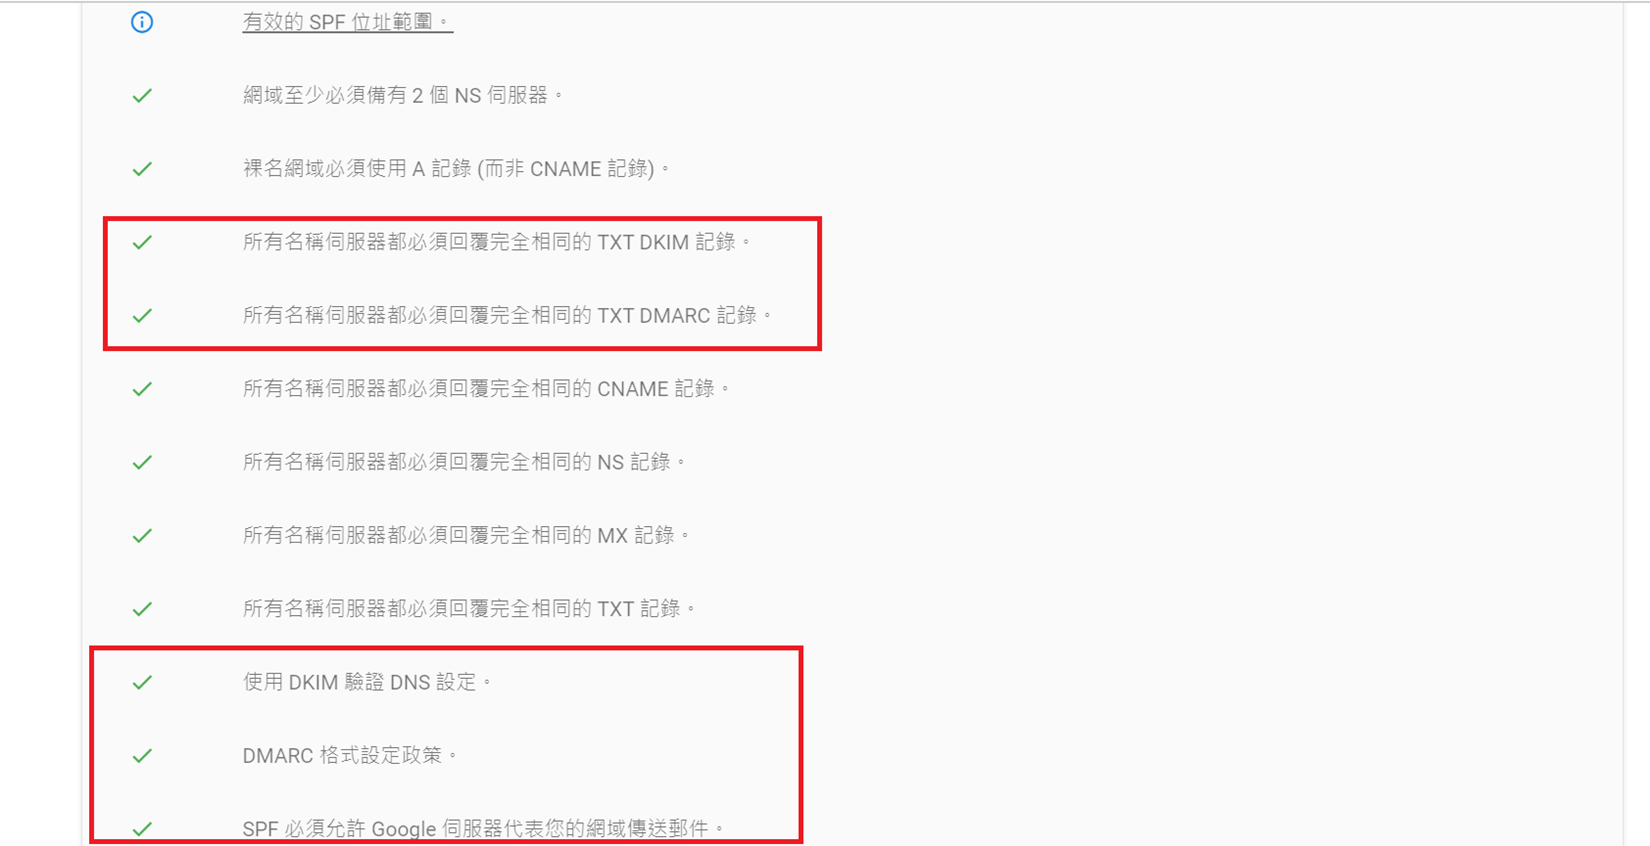
After Configuration, How Do I Confirm Everything Is Set Up Correctly?
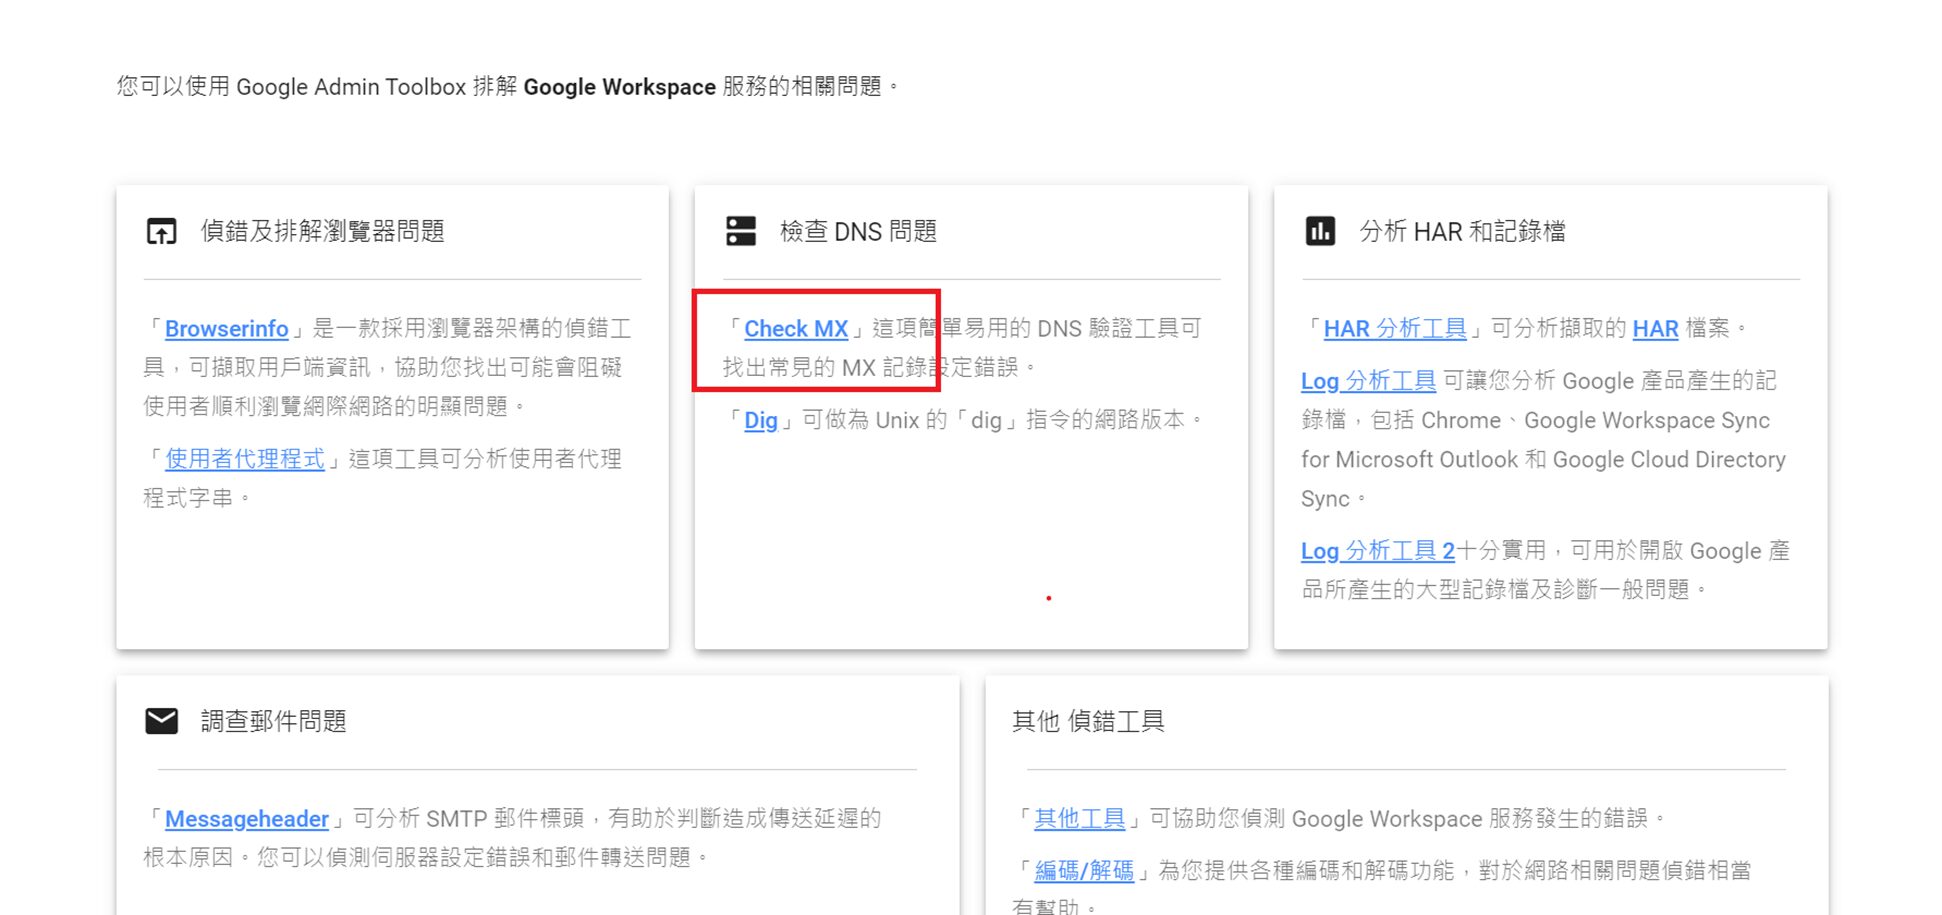
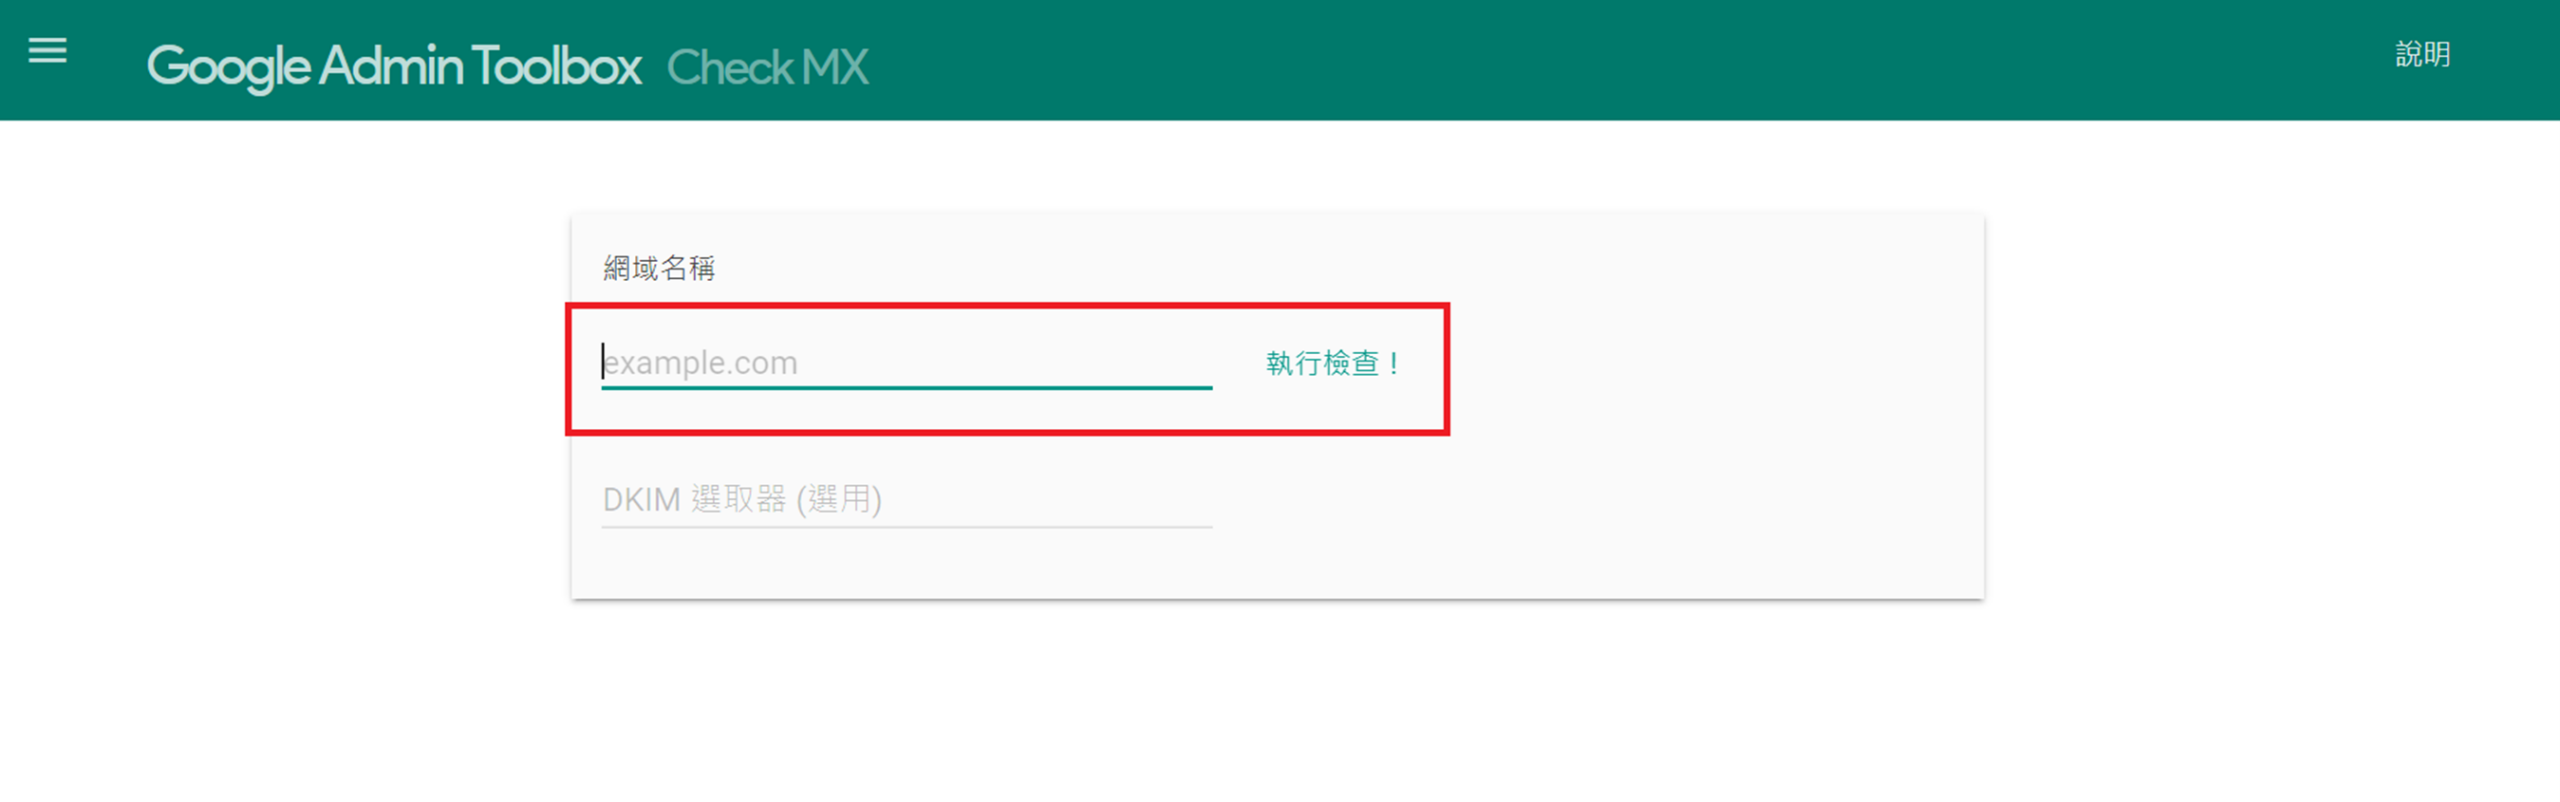
Microfusion reminds you not to skip the final verification step. We recommend using the Google Admin Toolbox to perform a diagnostic check. Simply enter your domain name, and the system will automatically scan whether your SPF, DKIM, and MX records are functioning correctly. The more green checkmarks you see, the higher your email deliverability will be!
Find DNS Configuration Too Complex? Worried About Security Gaps in Your Organization? Microfusion is a premier partner holding multiple top-tier designations with Google, including Services Partner, Co-sell Partner, and Technology Premier Partner for both Google Cloud and Google Workspace. Across four key domains—Security, Infrastructure, AI, and Chrome—Microfusion has earned professional certifications, enabling us to provide comprehensive optimization for your Google Workspace environment, from email security to automated collaboration. With our team of expert architects and technical specialists, we deliver end-to-end cloud solutions tailored to your business needs.